Saturday 25 October 2008

Auto-Correct Spelling Mistakes In Bash Shell

I am very poor at both typing and spelling, and often make silly little mistakes when typing. The following tweak will help you a lot if you have the same problems. To open and edit the .bashrc you can use any text editor like kate, gedit, vim, nano etc.

At the bottom of your .bashrc file, add the following:
shopt -s cdspell

This will ignore any simple mistakes such as typing cd /otp instead of cd /opt, or cd /ect instead of cd /etc.

Simple, but very effective!

Funniest Ubuntu Image Ever?

Whilst browsing Fickr the other night, I came across a really funny review that someone had left on Amazon about his purchase of an Ubuntu CD. I take no credit for this image, and here is the link to the page where I found it: http://www.flickr.com/photos/27373994@N02/2554310312/

Funny Ubuntu Image

Thursday 23 October 2008

How To Watch Any Video In ASCII

Okay, so I got bored at college, and had a play around with some things.. and what I came up with was amazing

First, make sure you have mplayer & LibAA installed:
sudo apt-get install mplayer
sudo apt-get install libaa-bin

Okay, so now here is the cool bit!
(You'll need an AVI video for this... you can download youtube videos from http://www.vixy.net in AVI format)

Once you have an AVI file downloaded and ready to use, you can play the video in ASCII mode using the following command:

mplayer -vo aa xxxxx.avi

Just change xxxxx.avi to your video name .avi

Nice huh?

And if you want to view the video in color, you will need to download and install Caca-Utils:
sudo apt-get install caca-utils

And to paly the video:
mplayer -vo caca xxxxx.avi


Have a look at some of the settings using
mplayer -vo --help

to find how to change the contrast and many other options of the video.

If you have any problems with install or using any of these applications, then please do leave a comment to you, and I will help you as much as I can do.

Thursday 16 October 2008

Terminator - Ubuntu Application

Terminator is a handy little application that helps users have a number of Terminals on the same screen. With terminator allows you to split the Terminal window both in horizontal and vertical columns and rows.

To install:
sudo aptitude install terminator


Terminator For Ubuntu
Image from: matt.bottrell.com.au


To create a new row or column, simply right click and chose how to split it. I find this application really useful on my MSI Wind, due to the small screen that I have. Having tabs is okay, it makes this so much more easier splitting the screen into two like that.

Saturday 11 October 2008

Enabling Google Repositories

Enabling Google's Linux repositories is a great way of keeping up-to-date with the latest release of Google Linux applications. Its quick and easy to enable these repositories, so I highly recommend doing it.

First things first, you will need to edit the /etc/apt/sources.list file:
sudo gedit /etc/apt/sources.list

and add the following line at the end of the file:
deb http://dl.google.com/linux/deb/ stable non-free


Now download the key:
wget -q -O - https://dl-ssl.google.com/linux/linux_signing_key.pub | apt-key add -
and finialy update:
sudo apt-get update


You're good to go!

SLiM - Simple Login Manager

Fancie a change from the default login screen?
SLiM, or Simple Login Manager is a simple desktop login manager available for Ubuntu. Although simple, you can configure it to how you like with themes, and configuration files.

SliM comes with the following default theme:

SLiM Default Theme


...Already think it looks sexy? Well, I have found a page with many SLiM Themes. Defiantly worth checking it out! And if you can't find a theme that suits your needs, have a go at making one. I have yet to make a theme of my own, but as soon as I have some spare time, I will create on and see what it turns out like. I'll post it on here for everyone to share :)

Wednesday 8 October 2008

MSI Wind - Mini Notebook

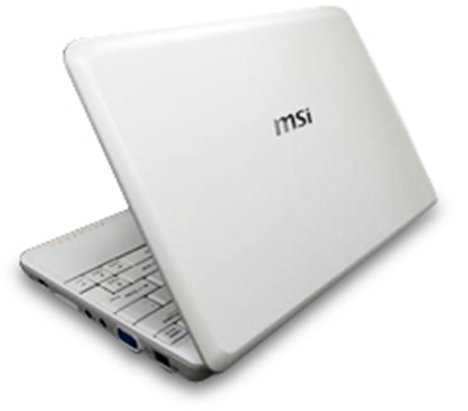
My Asus EEEPC finally decided to die the other week. I only had it for 9 months, but I don't think I ever turned it of from the first day that I got it. So it did me well and proud. However, it was now time to get a new laptop. After a lot of searching around for the one that would fit my needs the best, I chose to get the MSI Wind.


MSI Wind


At only £299.95GBP ($480-ish) from This Site, I thought that was a great price. When I received my MSI Wind a day later, I couldn't wait to play around on it. I booted it up, and A nice fresh install of OpenSUSE Linux appeared. After a few hours of playing around with it, I decided that I wasn't too fond of it, and set on installing Ubuntu onto it.

Of course, be being an Ubuntu type person, I recommend you install Ubuntu onto it too :)
So first things first, What you will need:

1Gb+ USB Stick
Computer running Windows / Ubuntu
... MSI Wind!

Now to start, you will need to download an ISO Image of Ubuntu 8.04.1. Notice it is 8.04.1 and not 8.04. There were problems when installing 8.04 onto the laptop, freezing up half way through many installations. Ubuntu soon realized this, and released a patch to stop this happening.

Once downloaded, you will need to install a small, and very useful program. This program is available on both Linux and Windows. Download For Linux Here, or for Windows Here

Once downloaded and installed, you will need to select from the drop down menu which version of Ubuntu you are wanting to install. After this, you can select the ISO image that you have just installed, and what drive you want to install it onto. Warning! Make sure that there is no data on your USB stick that you will want to keep! As it will erase everything. Once all your settings are in place, click OK to continue.


UNetbootin For Ubuntu
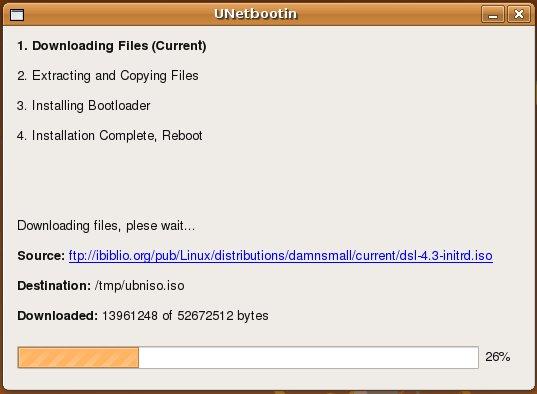
The screen will look a little like above.

Once complete (It may take a while) you are ready to go! Safely eject your USB stick, boot up your MSI Wind, pop in the USB stick, and Press F11 to enter Boot sequence. Select your USB, and click enter. You will now be prompted with a GRUB Loader. You can either select to test the live mode, or just install it.

Installation is just like any other Ubuntu installation, so I will not write what you need to do. If you are struggling with any parts of the installation, please do comment this post, and I will gladly write a simple step-by-step guide.

So once installed, you may realize that your WiFi isn't working. This is simple to sort out. Connect your MSI Wind to the internet via cable, and use the following command to install all the appropriate kernel headers:
sudo apt-get install build-essential linux-headers-`uname -r`

Next, download, and un-tar the correct drivers needed:
wget http://launchpadlibrarian.net/16098501/rtl8187se_linux_26.1016.0716.2008.tar.gz
tar xvzf rtl8187se_linux_26.1016.0716.2008.tar.gz

And build the driver:
cd rtl8187se_linux_26.1016.0716.2008
./makedrv

Now that the drivers have been installed, run the following command to insert the modules, and enable the WiFi:
sudo ./wlan0up


To map all of the new modules so that the wireless can work from boot, you will need to copy some of the files to the necessary places:
sudo cp -r ieee80211/*.ko /lib/modules/2.6.24-19-generic/kernel/drivers/net/wireless/
sudo cp rtl8185/r8180.ko /lib/modules/2.6.24-19-generic/kernel/drivers/net/wireless/


Lastly, run the following commands to finish the installation of:
sudo depmod -a
sudo modprobe r8180


You now have working wireless. Disconnect from the current wired internet, and any wireless networks that are in range should now be showing up in your network manager applet.

There are a few other little errors that you may notice. This site has a lot of little hacks and tweaks to get your Ubuntu running just how it should do on your new MSI Wind.

Saturday 4 October 2008

Install Microsoft Fonts In Ubuntu

It is generally a good idea to install the default Microsoft fonts when using Ubuntu. It can help when you are using such software as OpenOffice, giving it the look and feel that you have created the document in Microsoft Office.

Also, many of the websites that have been designed use the default Microdoft fonts. Although Ubuntu uses its own versions of the Microsoft fonts whilst viewing a webpage, it's nice to have these fonts to see how the website should properly look.

Fonts that are included in the msttcorefonts package are:

* Andale Mono
* Arial Black
* Arial (Bold, Italic, Bold Italic)
* Comic Sans MS (Bold)
* Courier New (Bold, Italic, Bold Italic)
* Georgia (Bold, Italic, Bold Italic)
* Impact
* Times New Roman (Bold, Italic, Bold Italic)
* Trebuchet (Bold, Italic, Bold Italic)
* Verdana (Bold, Italic, Bold Italic)
* Webdings


To install the Microsoft Fonts, you need to make sure that you have the Universe Repositories enabled. After you have done this, install the package using the following command:
sudo apt-get install msttcorefonts

You will now have all the core True Type fonts that come with a default Windows installation.

If you want other True Type fonts to use on your Ubuntu, it is as simple as downloading the font you want, and placing it in the ~/.fonts directory.

To use the newly downloaded fonts, you can either log out, and back in again, or use the following command to regenerate the fonts cache:
sudo fc-cache -fv

Thursday 2 October 2008

Manage Wallpaper With Feh The Image Viewer

Feh is a fast, light weight image viewer. Currently Feh supports slideshows, multiple windows, thumbnail viewing, dynamic zooming, mouse wheel & keyboard control, and the feature to set an image as a background image.

Feh is a great program to have if you are using a window manager like OpenBox, BlackBox etc. As you can set an image as the background, instead of the default grey / black.

To Install Feh, use the following command:
sudo apt-get install feh

You can now right click on an image, and chose to open with 'feh'.

To use Feh to set an image as a background, use the following command:
feh --bg-scale /path/to/image.jpg

Other parameters that you can use are:
--bg-tile
--bg-center
--bg-seamless